
【Tutorial】How to Use Unbounce
- 2023.09.20
- ランディングページ
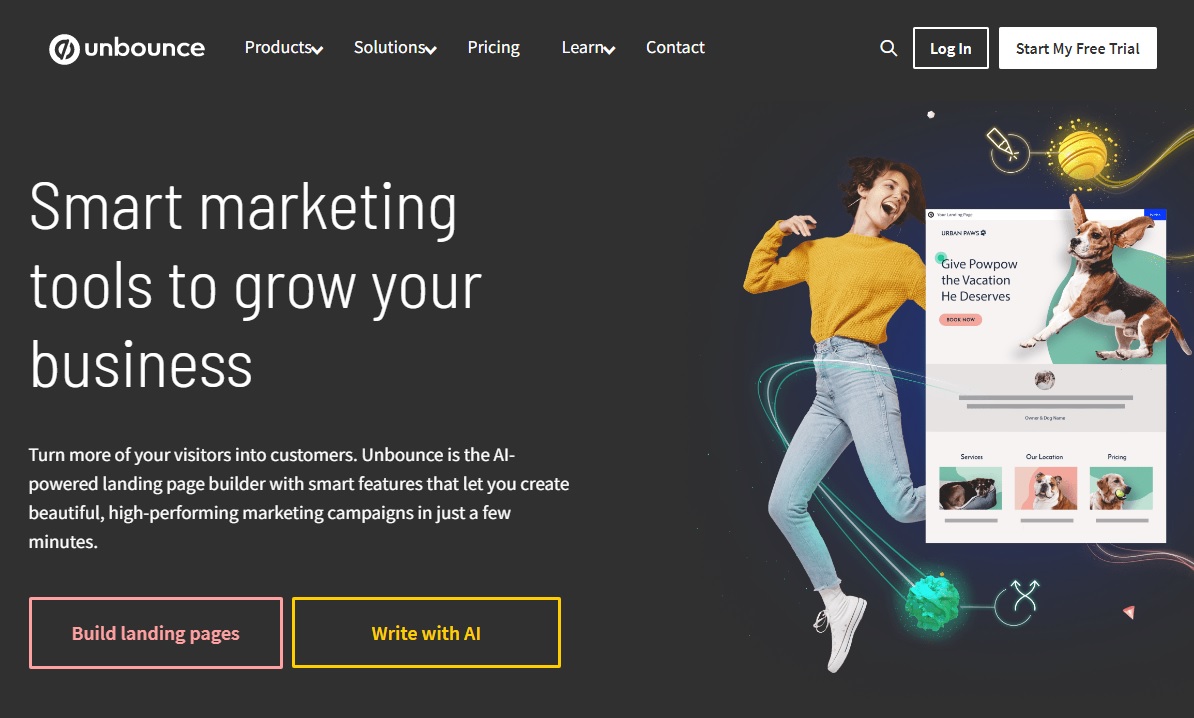
Unbounce makes it easy to create stylish landing pages.
In this article I will explain how to get started and use Unbounce.
This issue is also explained in the video. Please subscribe to our channel to see other videos about other contents. HirokiKitaoka(@kitaokahiro)
タップできるもくじ
How to Use Unbounce
Create account
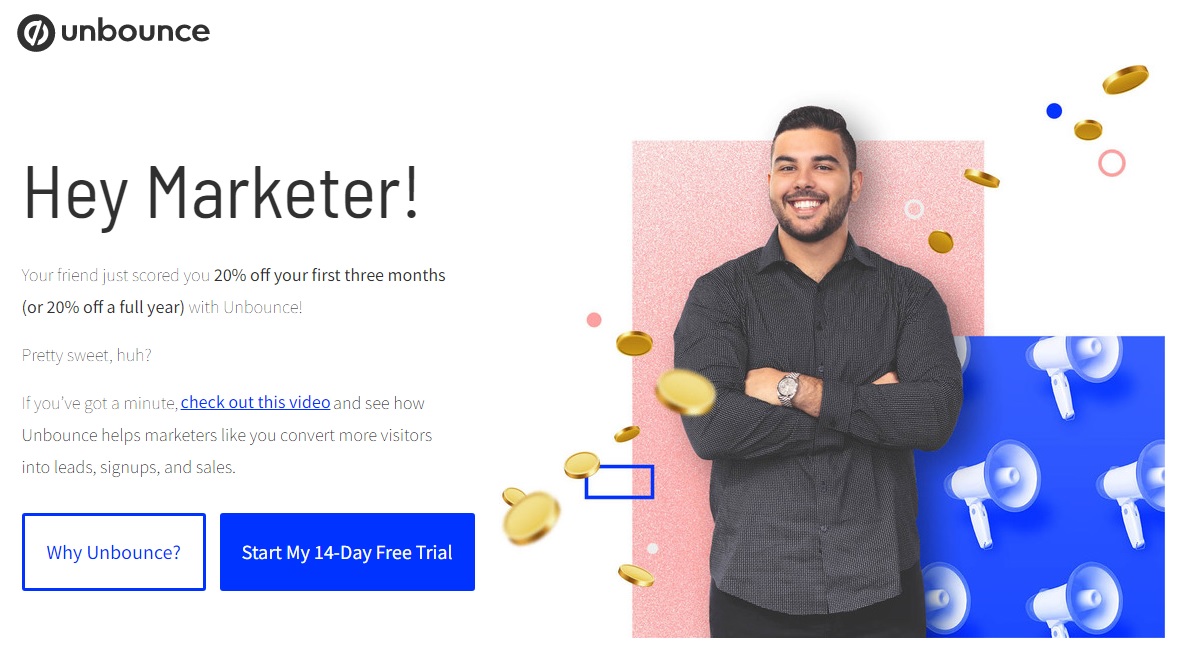
Access the official Unbounce website.
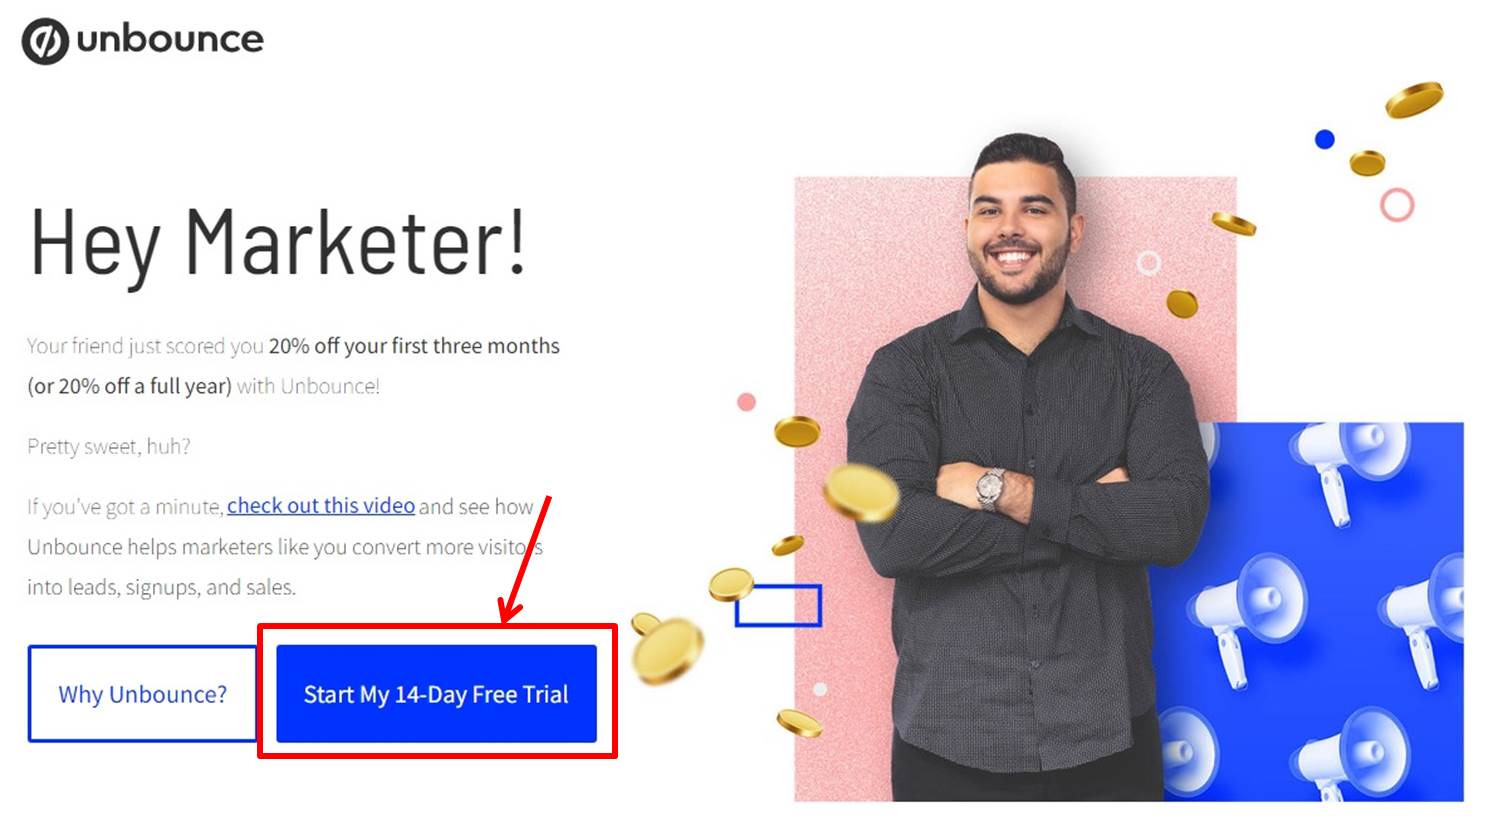
Click on “Start My 14-Day Free Trial”.
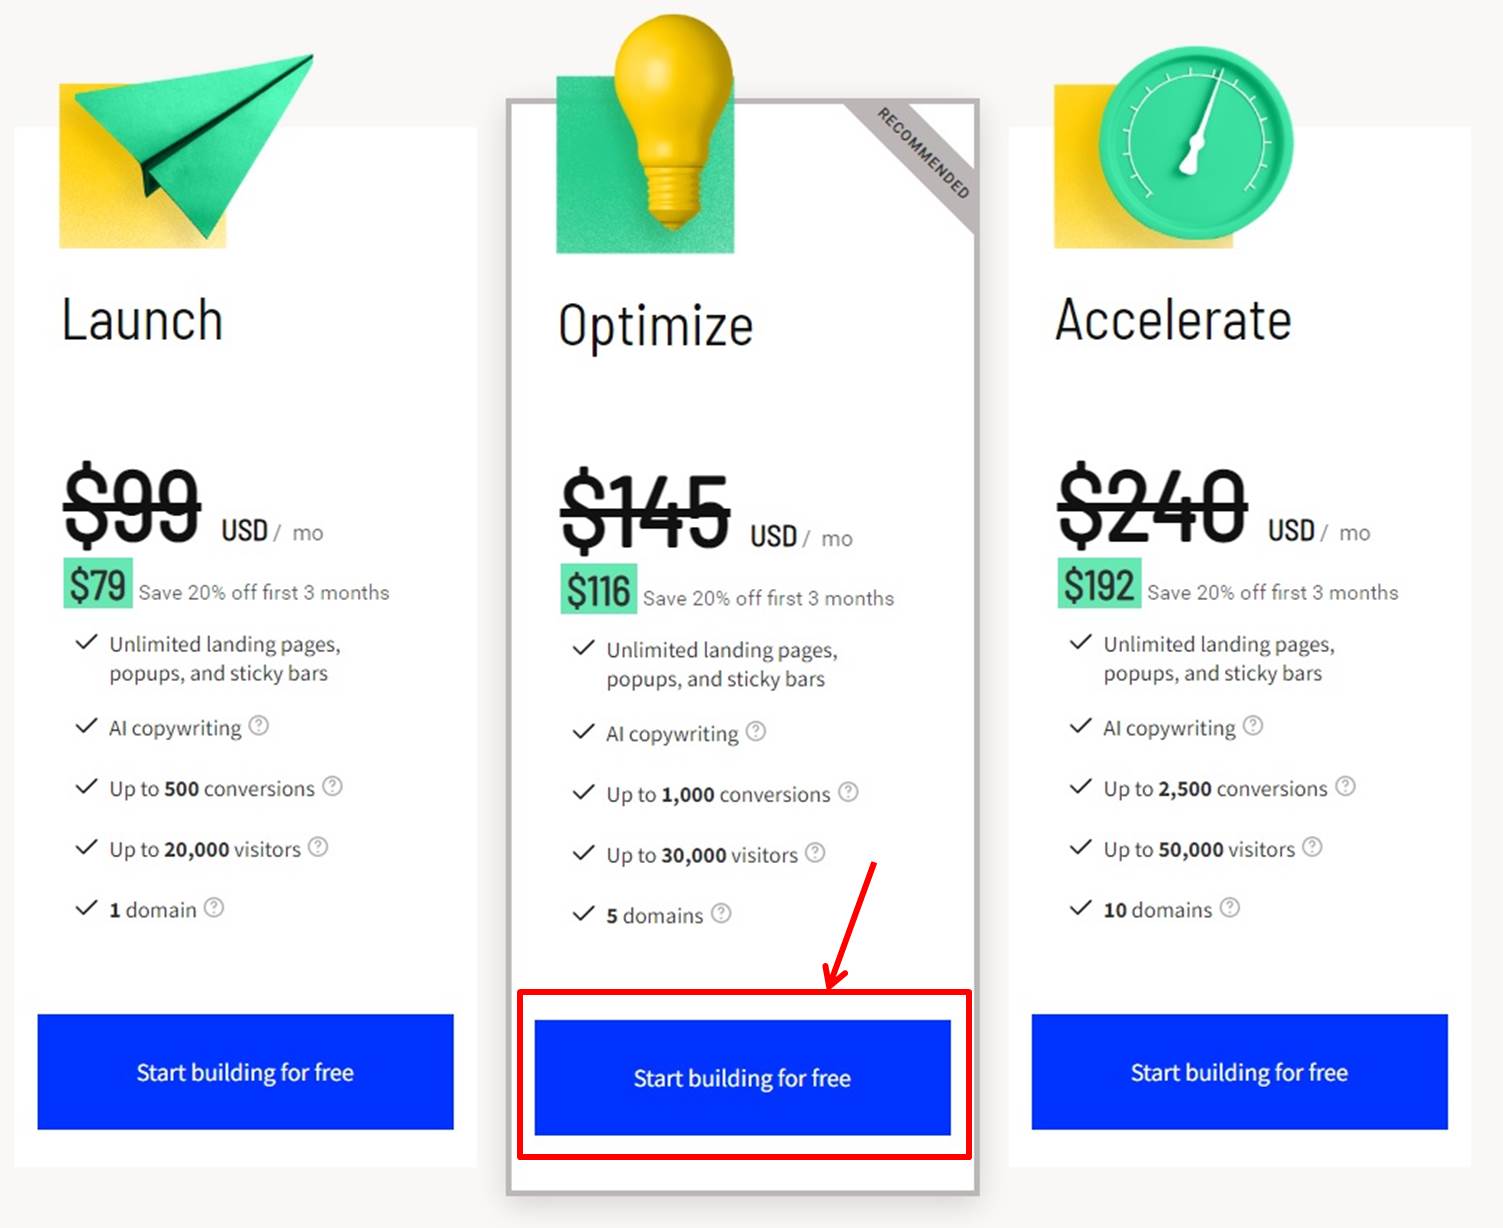
Click on “Start building for free” under Optimize PLAN.
Create your account.
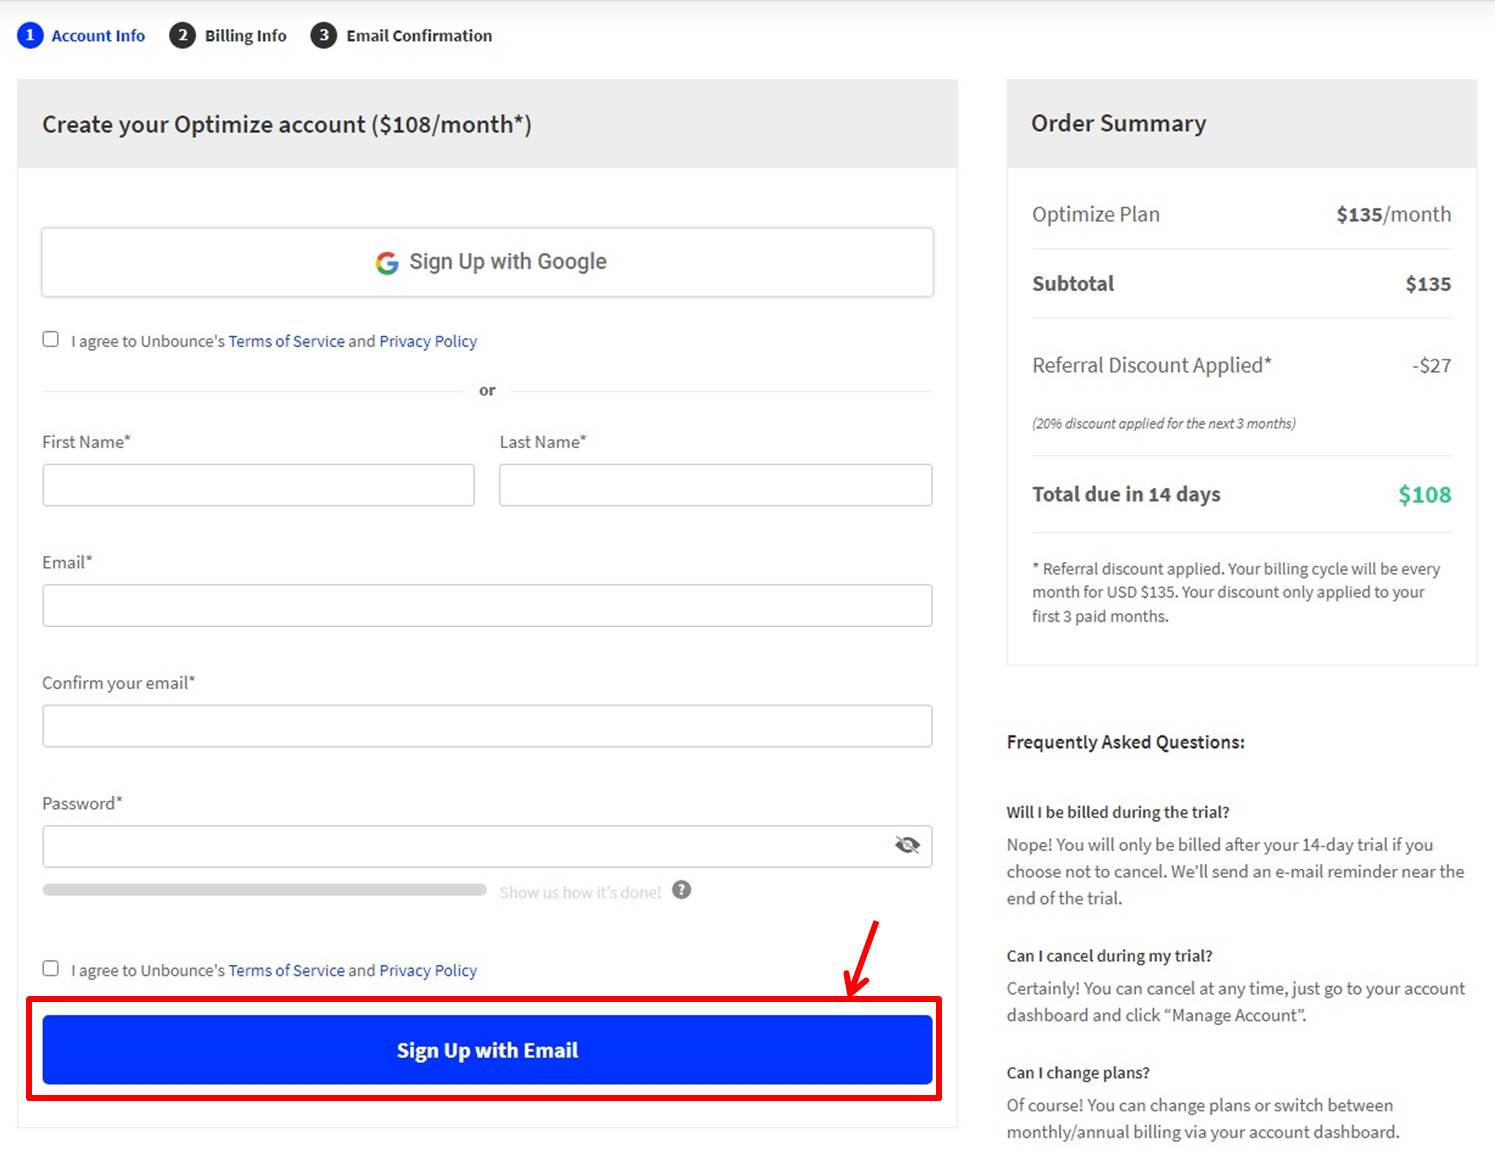
| First Name | Enter first name |
| Last Name | Enter last name |
| Enter email address | |
| Confirm your email | Enter email address |
| Password | Enter password |
Click on “Sign Up with Email”.
Enter payment information.

| Billing First Name | Enter first name |
| Billing Last Name | Enter last name |
| Company | Enter company |
| Phone Number | Enter phone number |
| Address | Enter address |
| City | Enter city |
| State/Province | Enter state |
| Zip/Postal | Enter zip code |
| Country | Enter country |
Enter your card information.
| Credit Card | Enter credit card |
| Expiry Date | Enter expiry date |
| Security Code | Enter security code |
Click on “Start My Free 14 Day Trial”.
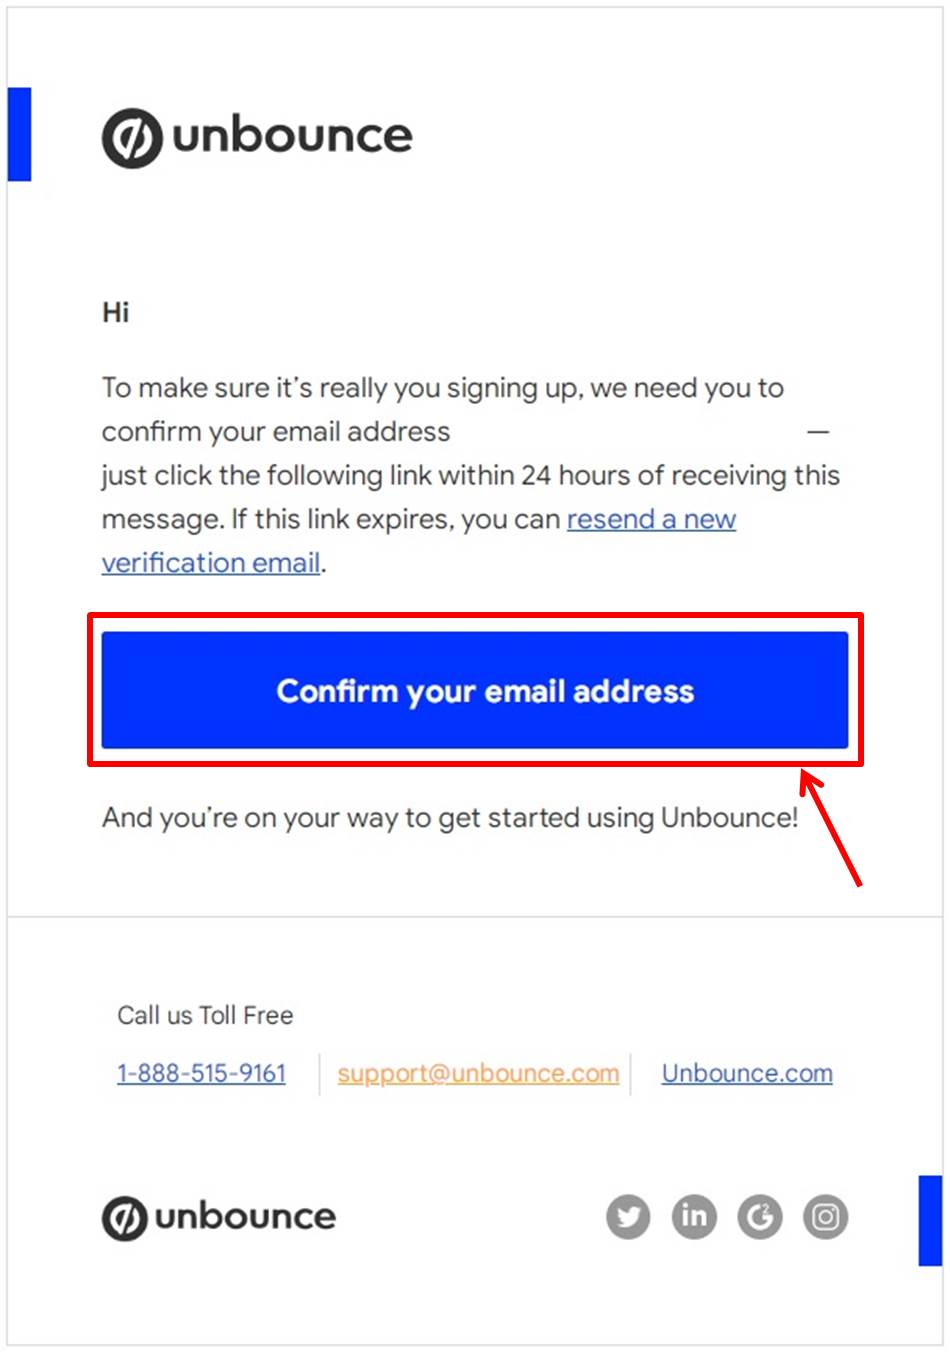
Email authentication.
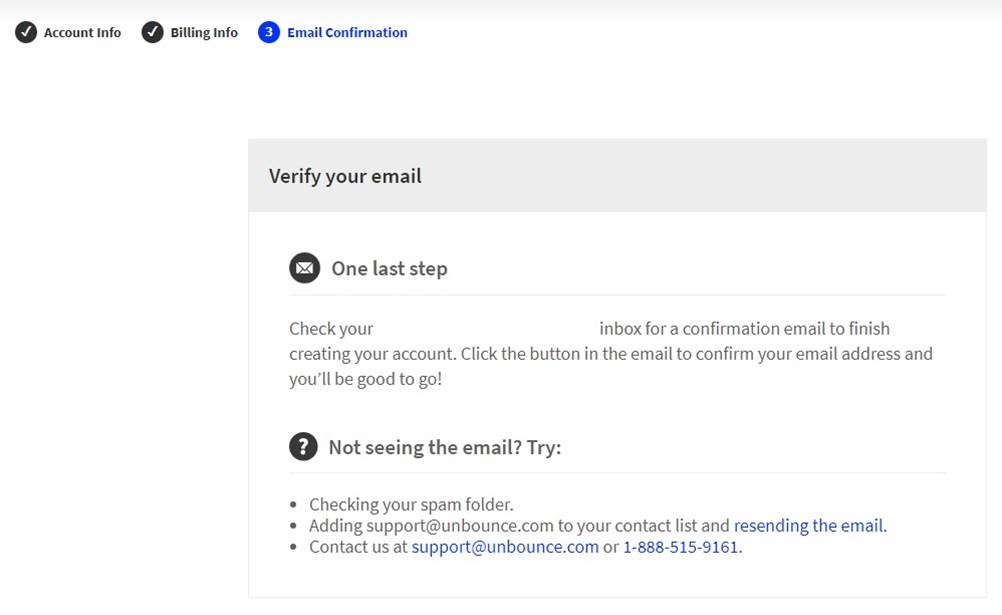
Click on “Confirm your email address”.
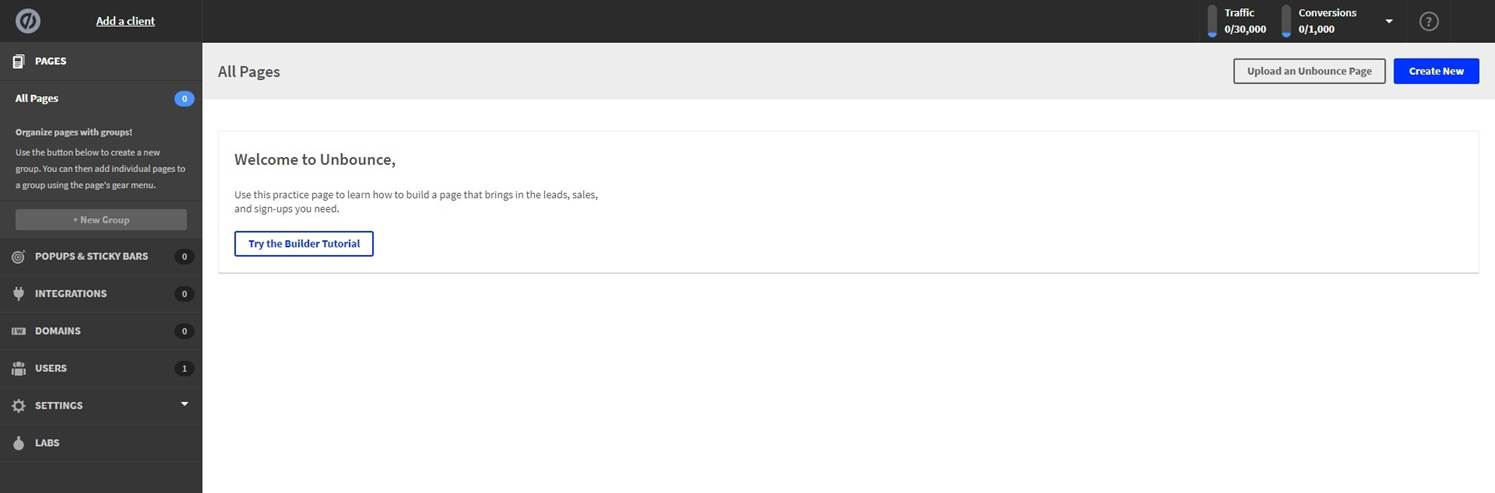
Go to the Unbounce dashboard.
Upgrade
Upgrade your plan.
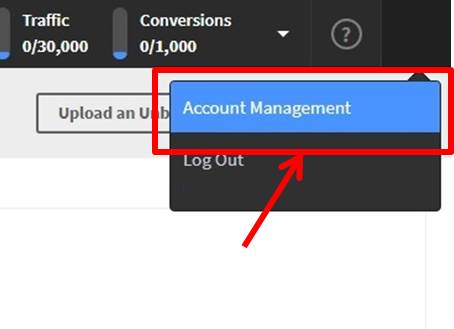
Click on “Account Management”.
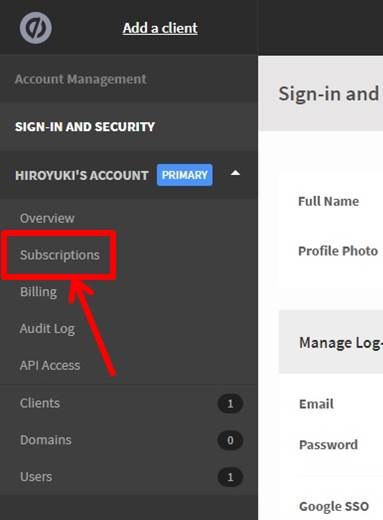
Click on “Subscriptions”.
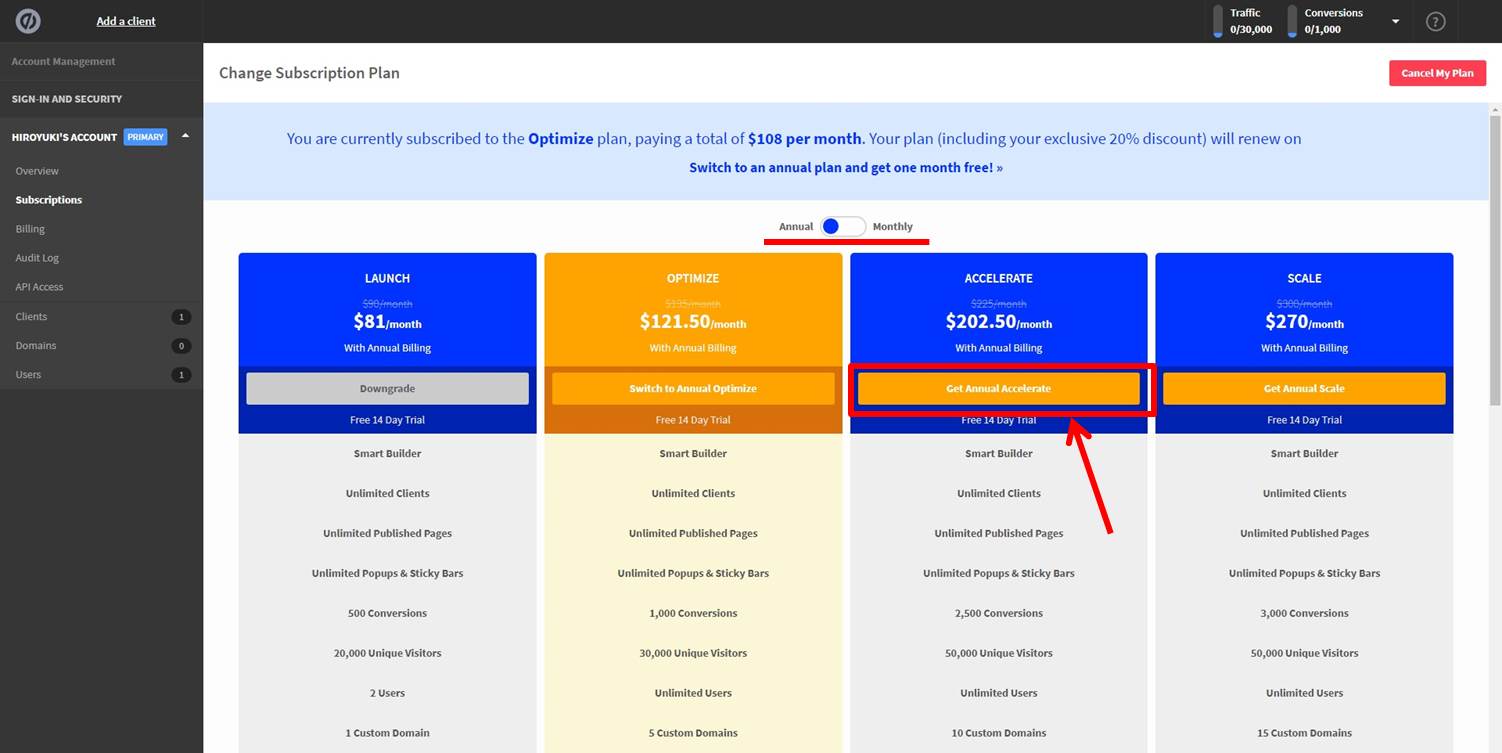
Select Yearly or Monthly.
Click on “Get Annual Accelerate” under ACCELERATE PLAN.
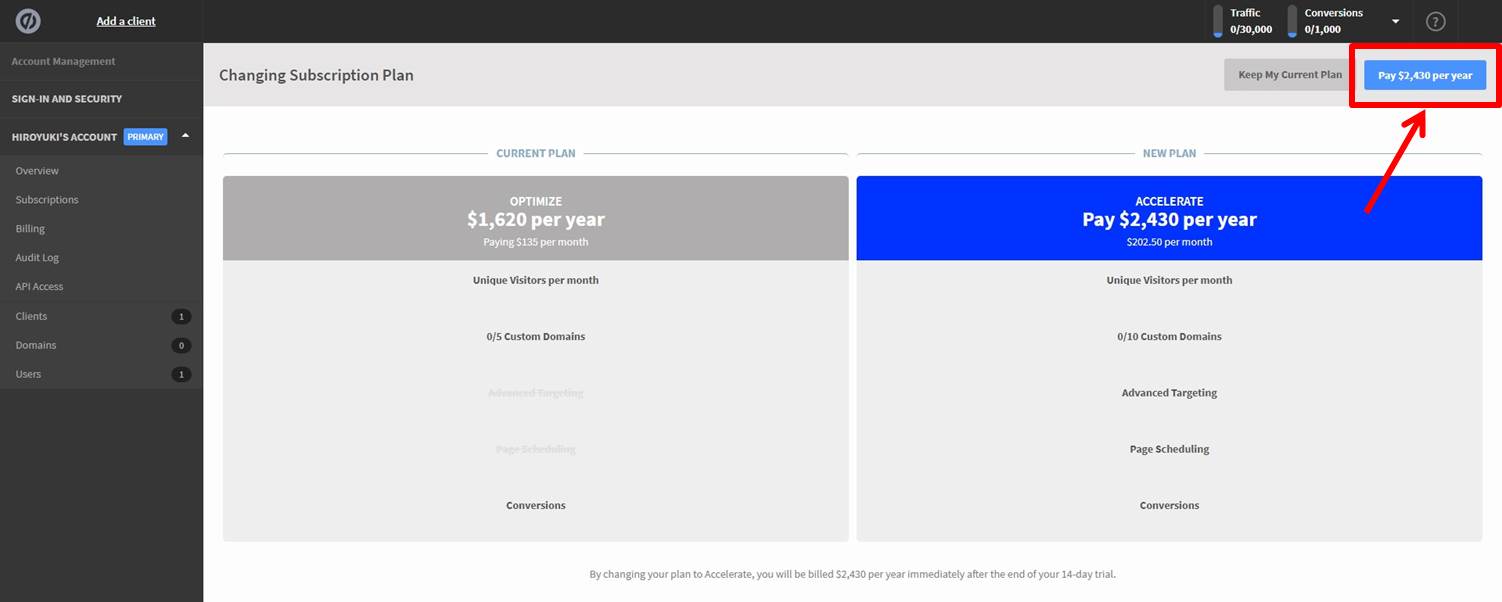
Click on “Pay $~”.
You are now ready to upgrade.
Login
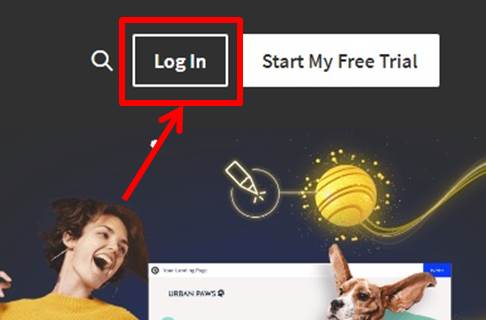
Access the official Unbounce website.
Click on “Log in” in the upper right corner.
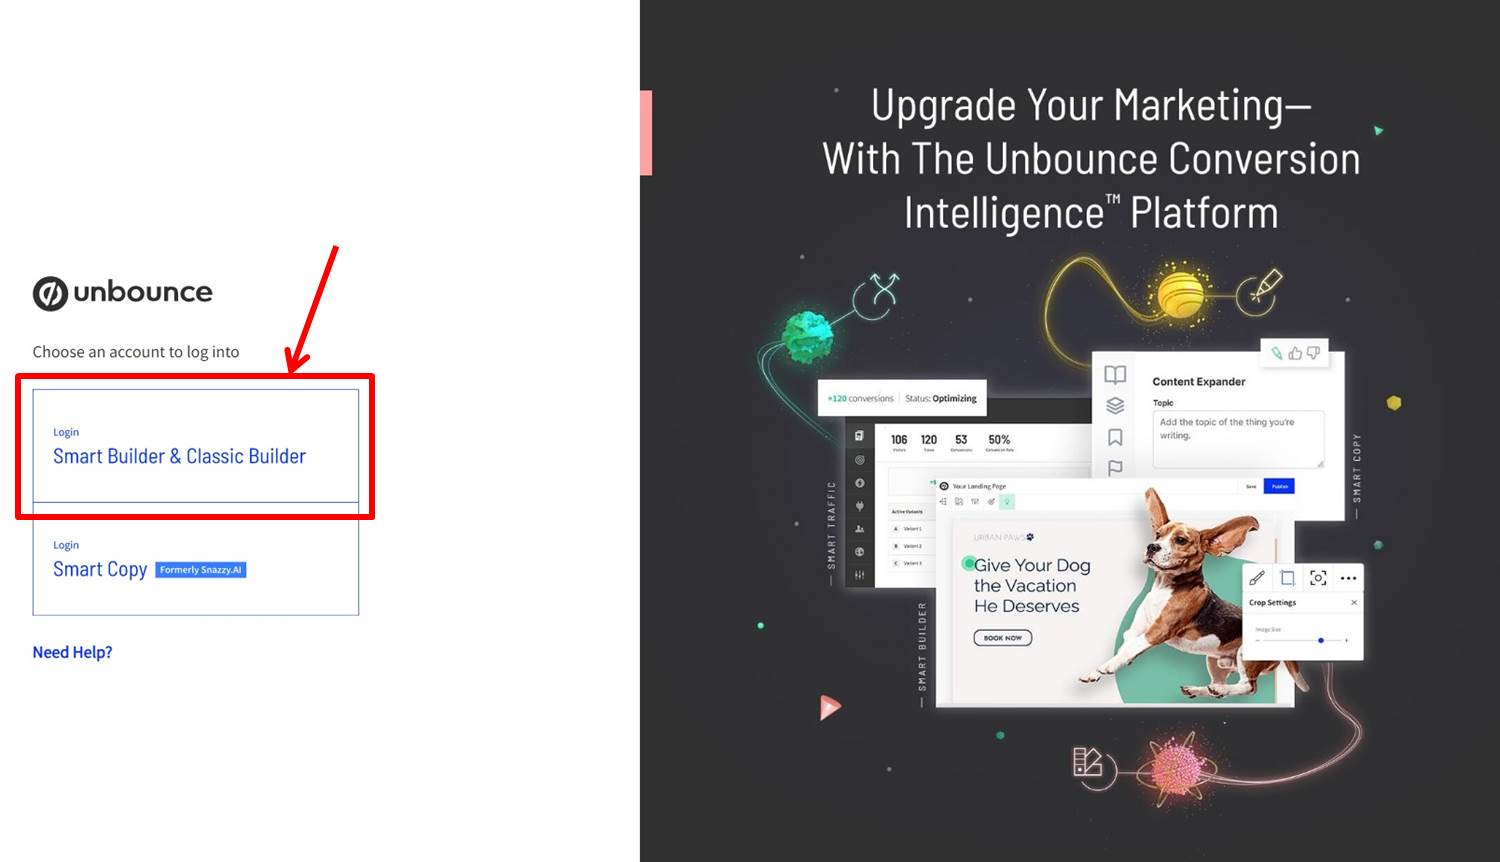
Click on “Smart Builder & Classic Builder”.
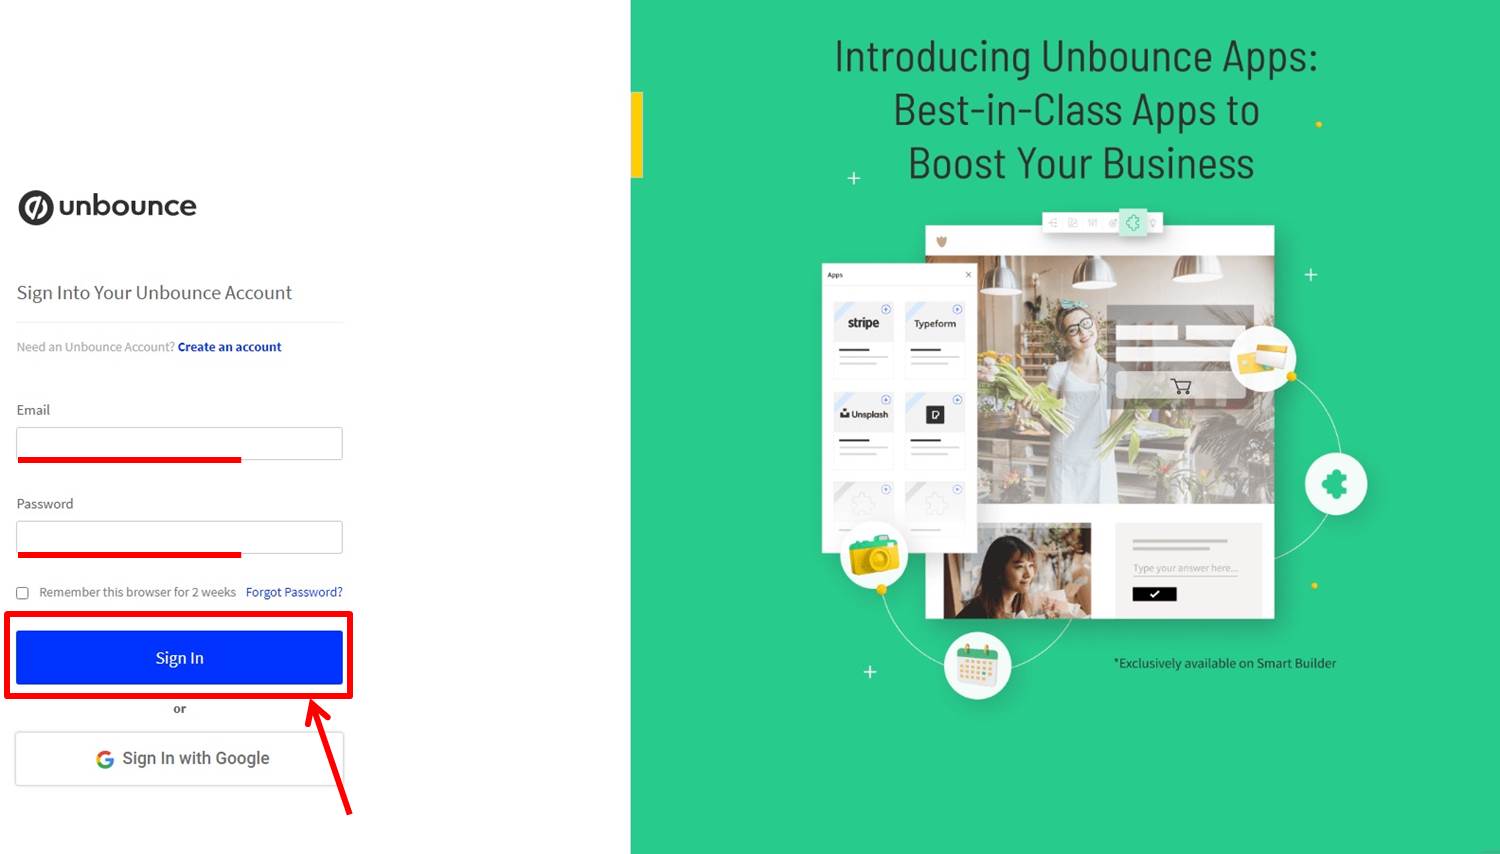
Enter your “Email Address” and “Password
Click on “Sign in”.
Once you are able to log in to Unbounce, you will be taken to the dashboard.
You are now logged into Unbounce.
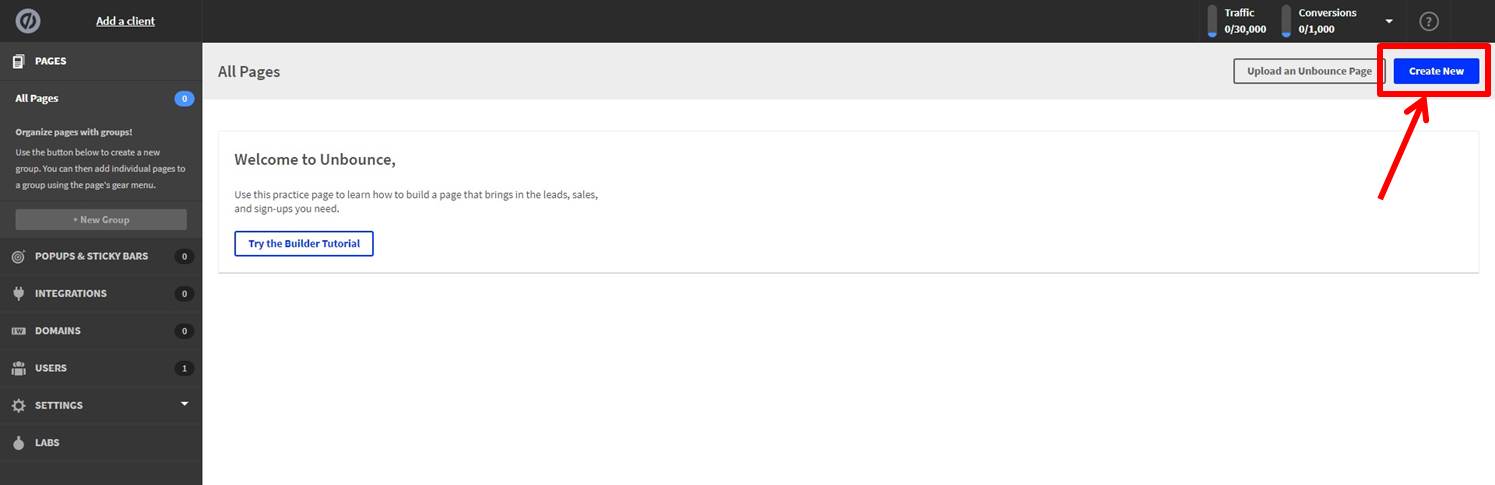
Create Landing Page
Click on “Create New”.
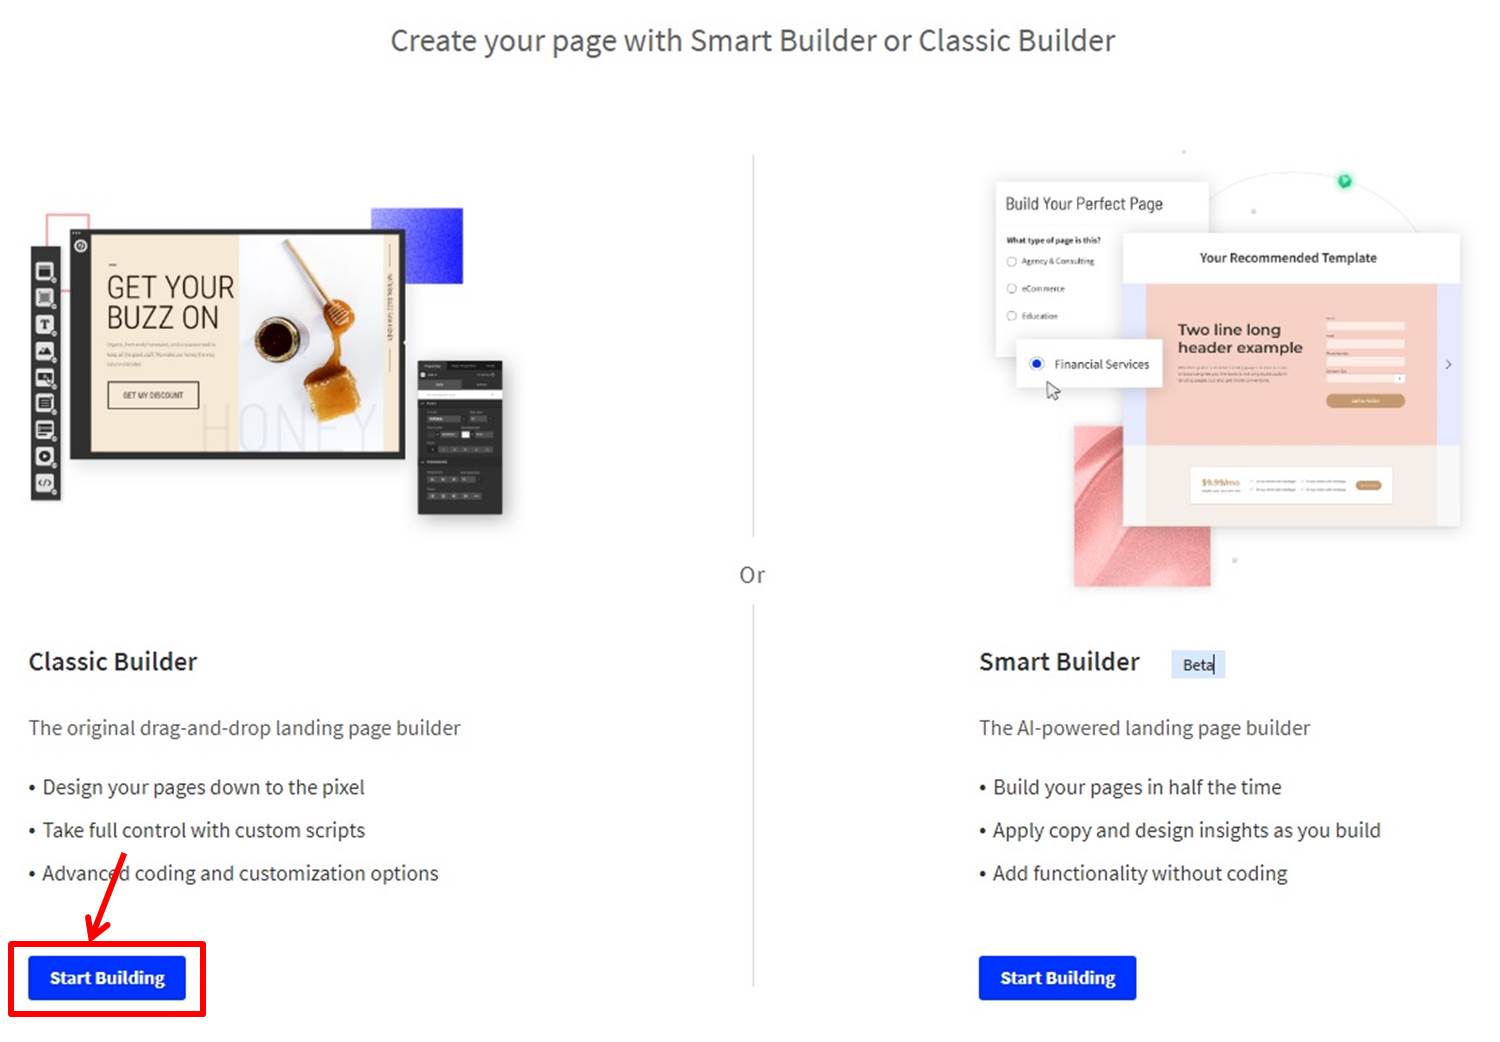
Click on “Start Building”.
Let’s answer the questions.
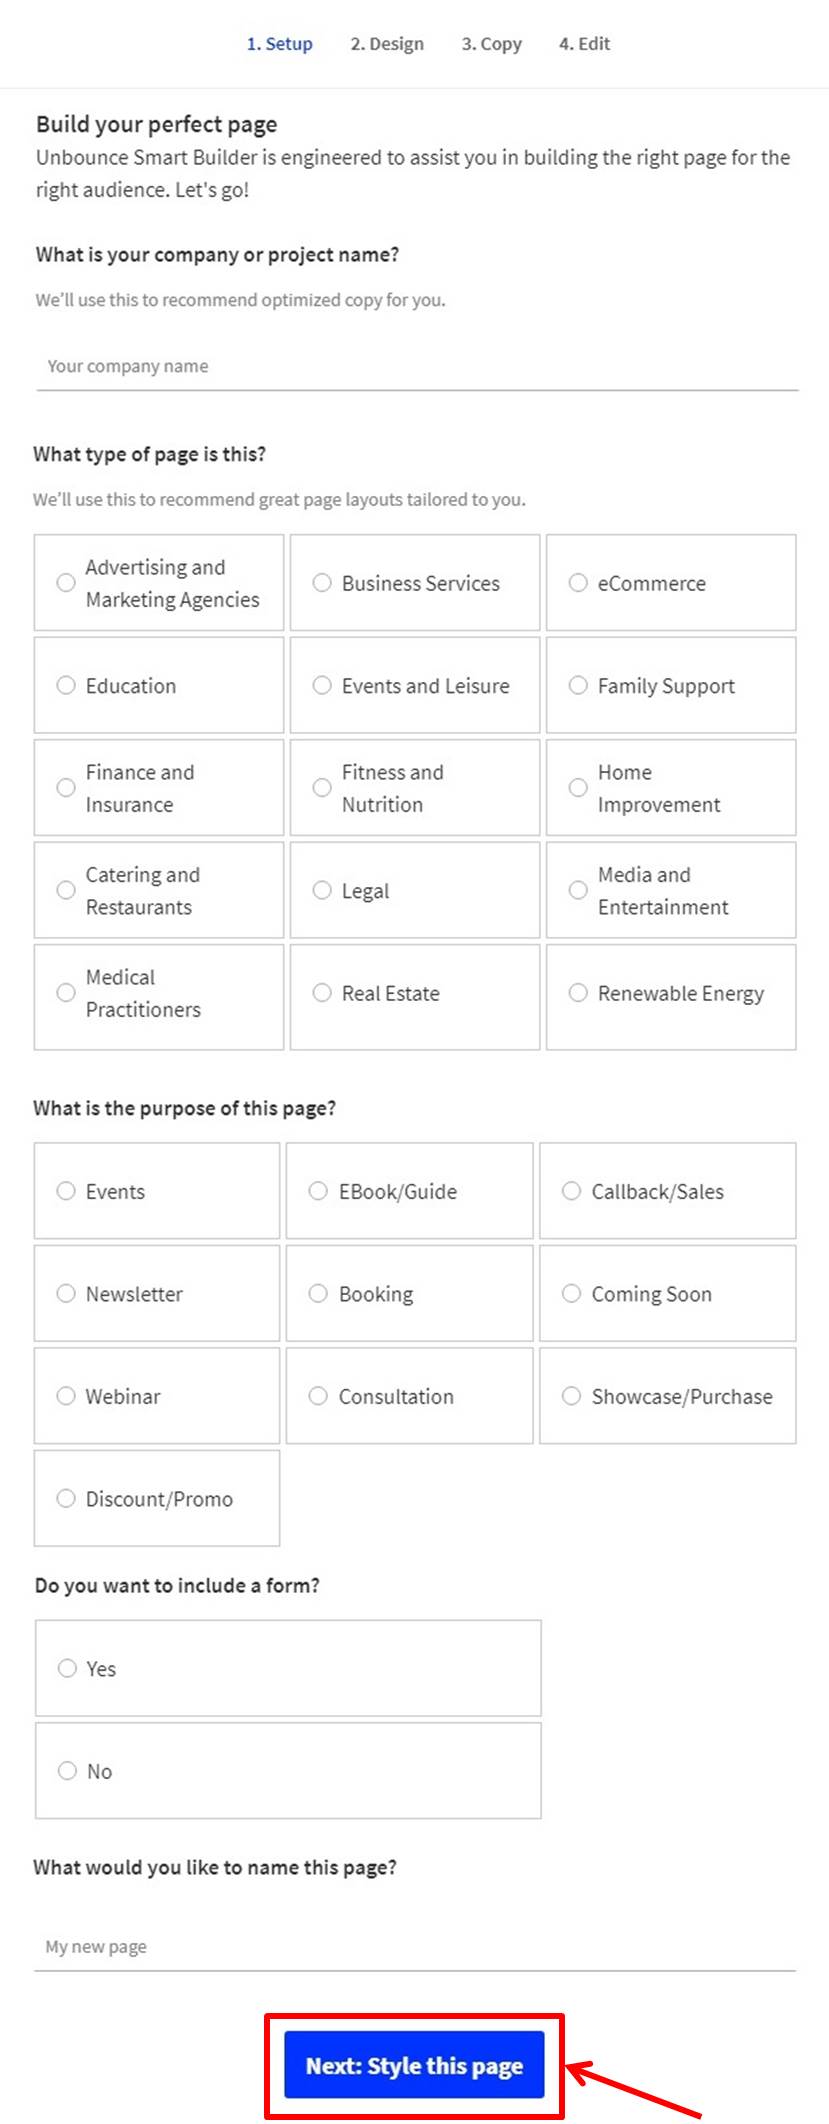
Click on “Next:Style this page”.
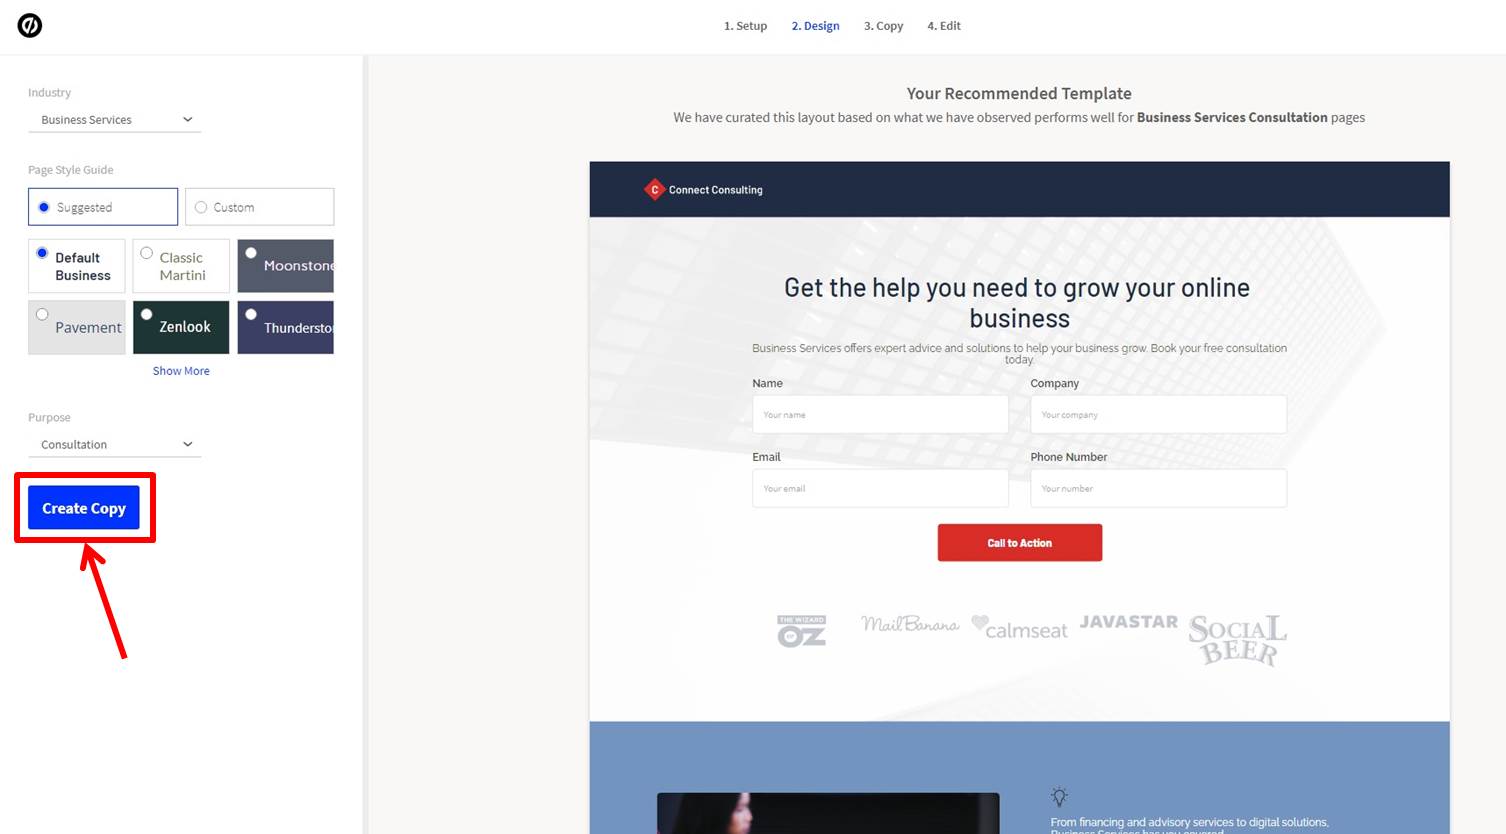
Click on “Create Copy”.
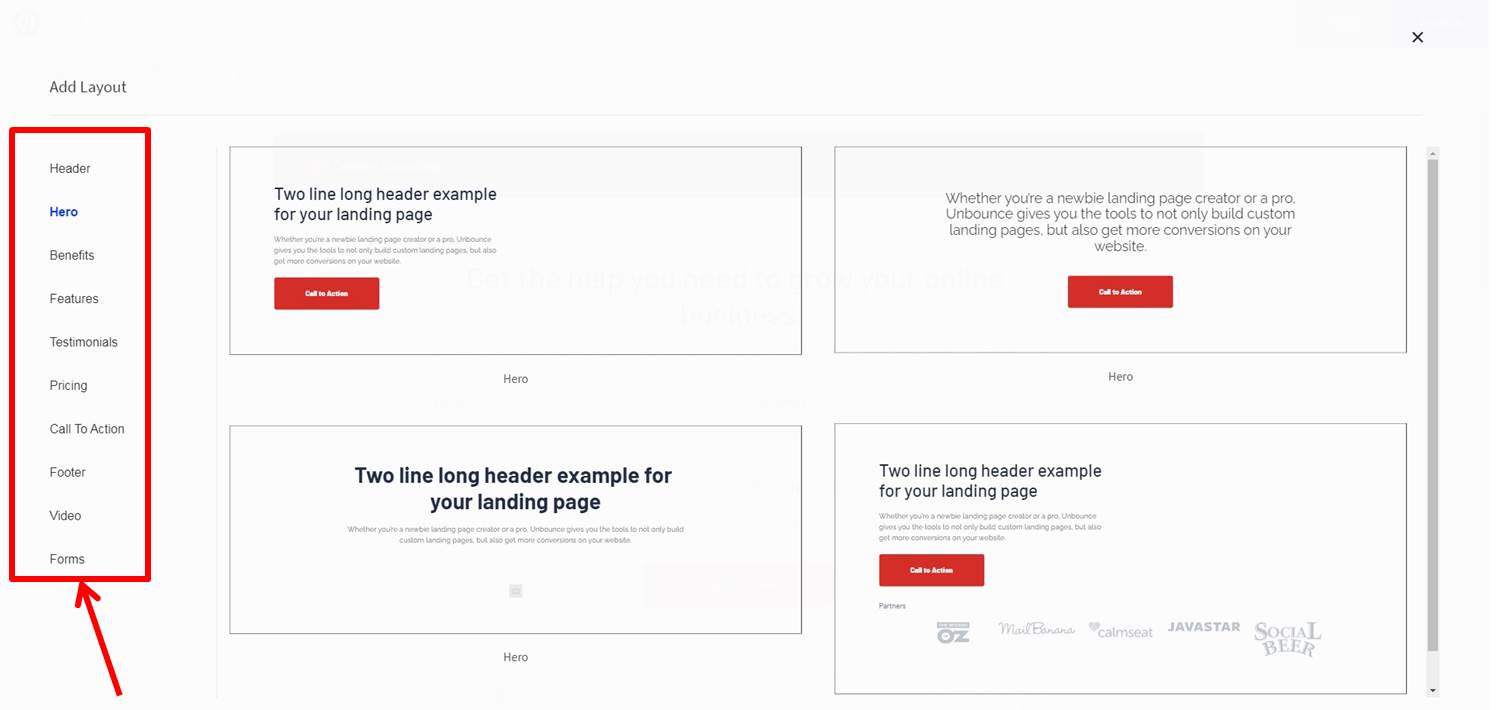
Click on “+”.
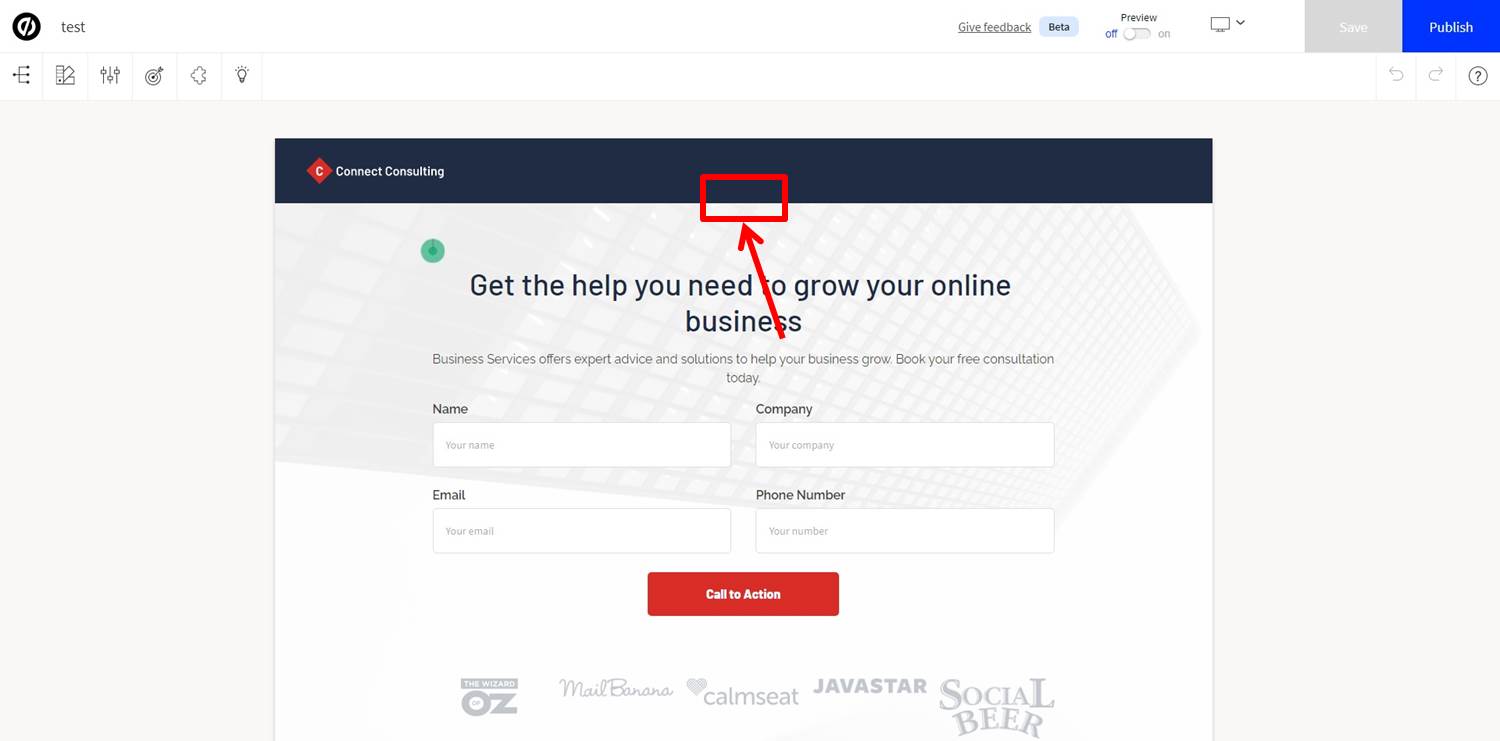
Add parts.
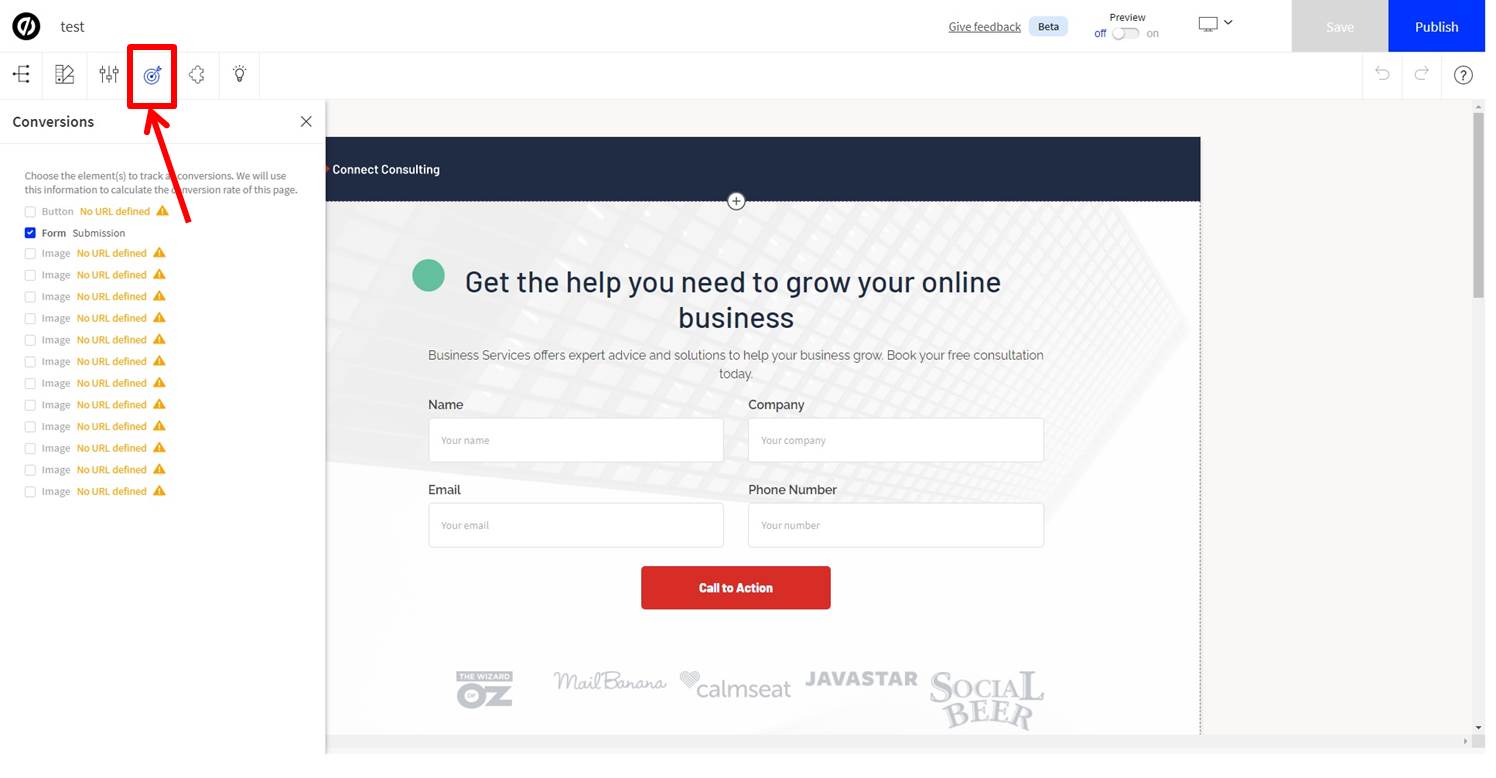
Conversion settings can be configured from the target icon in the upper left corner.
Click on “Publish” to publish.
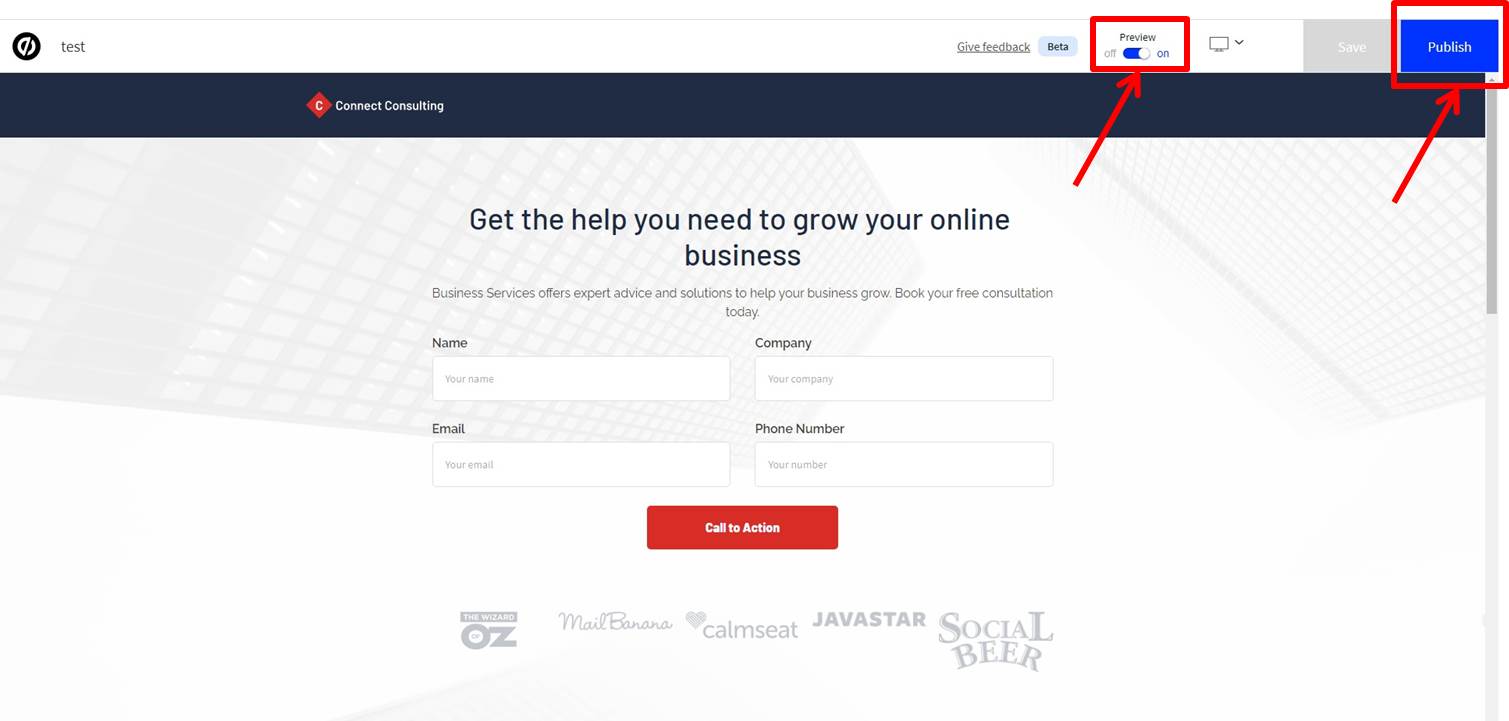
The landing page has now been created.
Unbounce
Unbounce is an LP creation tool that makes it easy to create stylish landing pages.
Unbounce makes it easy to create and manage landing pages.
Unbounce is a tool that allows you to create and manage landing pages easily.
The rich templates allow you to create beautifully designed pages quickly.
A/B testing function allows you to find changes efficiently and effectively improve your site.
In addition, the multilingual support makes it easy to create a global site, and the rich interlocking functions make it easy to integrate with other services.
Pricing plans can be selected according to your needs, so you can set the price according to the size of your project.
Even people who are not good at using tools can use it easily.
Even beginners will be able to create landing pages easily.
Unbounce features are summarized as follows
| Launch | Optimize | Accelerate | Concierge | |
| CV | 500 | 1,000 | 2,500 | 5,000 |
| user | 20,000 | 30,000 | 50,000 | 100,000 |
| domain | 1 | 5 | 10 | 25 |
| Smart Builder | 〇 | 〇 | 〇 | 〇 |
| Classic Builder | 〇 | 〇 | 〇 | 〇 |
| Pop-up | 〇 | 〇 | 〇 | 〇 |
| Smart traffic | × | 〇 | 〇 | 〇 |
| A/B testing | × | 〇 | 〇 | 〇 |
Unbounce prices
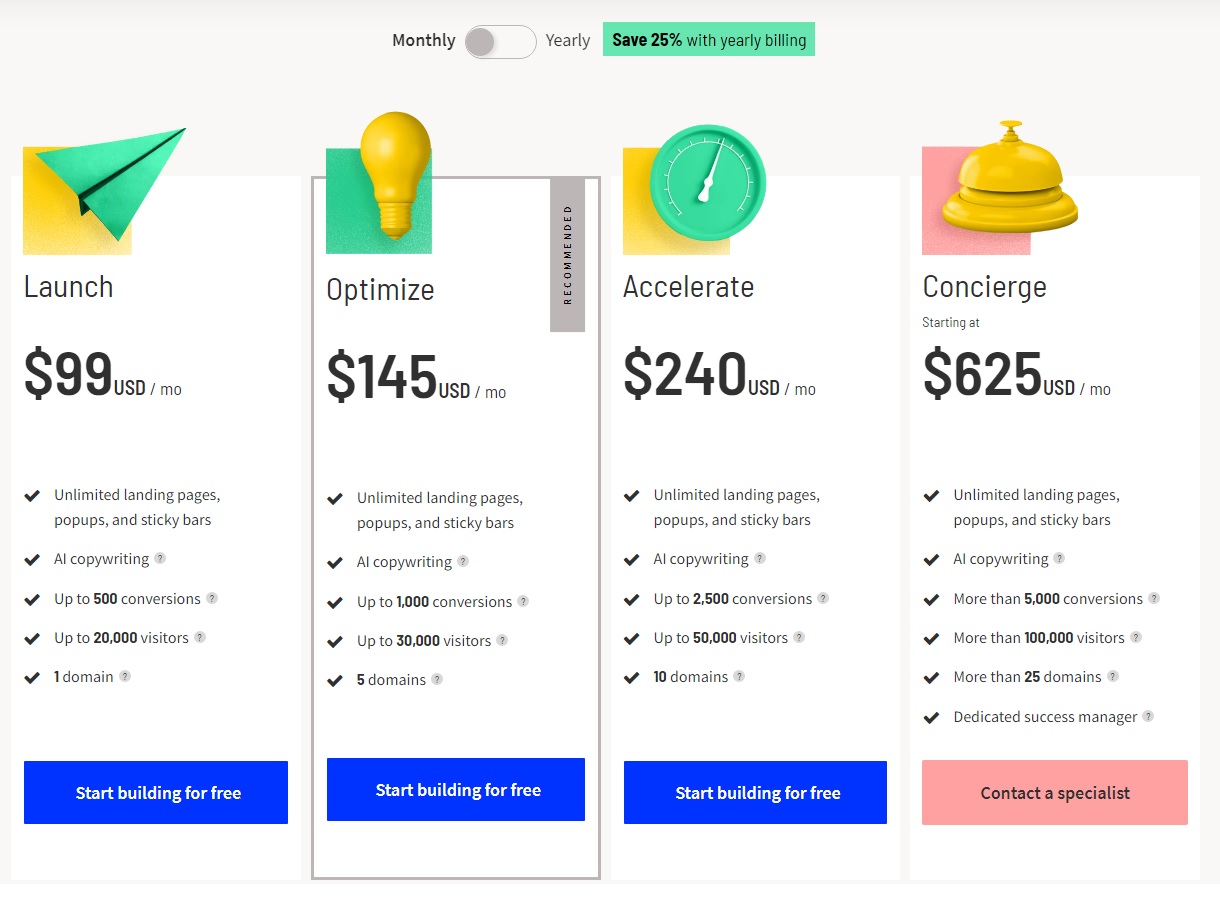
The following is a summary of Unbounce prices
| Monthly | Annual | |
| Launch | $99 | $888 |
| Optimize | $145 | $1,308 |
| Accelerate | $240 | $2,160 |
| Concierge | $625 | $5,628 |
Launch
| Monthly | $99 |
| Annual | $888 |
Launch plan allows for 500 conversions per month and a maximum of 20,000 users.
Conversions are counted when a user takes some kind of action, such as purchasing a product or requesting information.
The number of users is the number of people who accessed the landing page.
The number is limited to one domain.
Even if you exceed the limit, your landing page will not become private.
However, please note that you will be switched to a higher plan the month after you exceed the plan limit.
The Launch plan allows you to use the Smart Builder.
Smart Builder is a feature that allows you to create landing pages by simply answering multiple questions.
With Smart Builder, you can easily create landing pages with no code.
You can also use the Classic Builder, which allows you to create landing pages by drag and drop.
The Classic Builder allows you to create more complex designs than the Smart Builder.
Unbounce allows you to create landing pages with a high degree of freedom, so you can create a design that is more suitable for your product.
Unbounce offers a 14-day free trial.
If you don’t like it, you can cancel within 14 days at no cost.
If you decide to use Unbounce, you can cancel within 14 days at no cost to you.
Optimize
| Monthly | $145 |
| Annual | $1,308 |
Optimize plan allows 1,000 conversions per month and a maximum of 30,000 users per month.
Domains are limited to 5.
A/B testing and Smart Traffic are available from the Optimize plan.
Smart Traffic is a feature that analyzes and directs users to the LPs that convert the most on multiple landing pages.
You can think of it as an automated A/B test.
It is recommended for those who have already achieved a certain level of conversions and want to identify areas for improvement.
Accelerate
| Monthly | $240 |
| Annual | $2,160 |
Accelerate plan allows for 2,500 conversions per month and a maximum of 50,000 users per month.
The number of domains is limited to 10.
You can use all the features available in the Optimize plan.
The Accelerate plan is recommended for large sites.
Concierge
| Monthly | $625 |
| Annual | $5,628 |
Concierge plan allows for 5,000 conversions per month and a maximum of 100,000 users per month.
Domains are limited to 25.
You can use all the features available in the Accelerate plan.
If you are running a huge site, we recommend the Concierge plan.
 LINEに登録いただくと下記をプレゼント!
①プロが教えるおすすめAI副業
②業務で使える!AI活用術
③おすすめAIツール
④高単価アフィリエイトプログラム100選
⑤ブログ運営に必須のツール
⑥ブログ初心者がやりがちなブログの失敗談
AIという新しい力をぜひ活用しましょう。
LINEに登録いただくと下記をプレゼント!
①プロが教えるおすすめAI副業
②業務で使える!AI活用術
③おすすめAIツール
④高単価アフィリエイトプログラム100選
⑤ブログ運営に必須のツール
⑥ブログ初心者がやりがちなブログの失敗談
AIという新しい力をぜひ活用しましょう。
-
前の記事

【Tutorial】How to Use Instapage 2023.09.20
-
次の記事

【FAQ】Leadpages(リードページズ)のよくある質問 2023.12.04